Making your own snath
The one-grip snath
Sant Pere de Ribes Click each image for a larger view.
| 1. Start with a 30x30mm./1 1/4″ x 1 1/4″ piece of hardwood (ash, oak, maple, hickory, birch, beech, or almost any other hardwood will be fine) how to buy Lyrica online the same length as your height. Check which end has better grain and fewer knots and choose that as the blade end. | 
Blade end
If the snath you are making is for a shorter blade (under 65 cm) and thus for “trimming” work, centre the mortise for the grip at point B. If for “field mowing”, make this mortise at point “C”–5cm/2″ further from the blade.
The finishing touch is to paint your snath with one or two coats of blended linseed oil and turpentine. This will protect the wood from moisture and rot, though the scythe should still be stored indoors.
Another option for making an ergonomic snath–more photos are on the way: Use a tree sapling about 5cm./2″ in diameter and follow the same procedure as above. There are two potential benefits with this method. 1) You can find a sapling with curvature near the bottom which works with any tang angle regardless of your height; i.e. you can make use of any blade model, provided the hafting angle is satisfactory. Making a grip for the Eastern-style snath from wild wood.
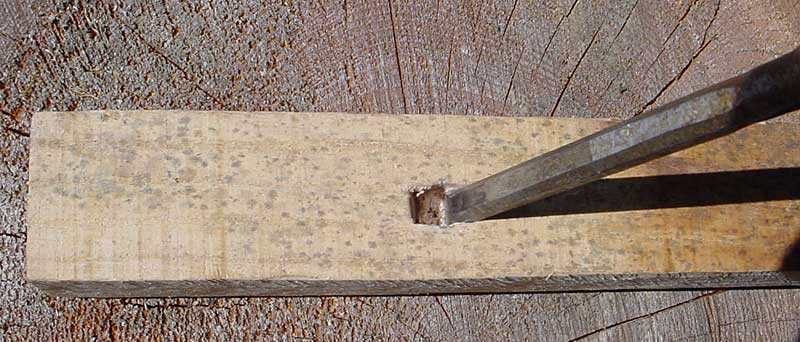
The tenon is easiest made with a 3/4″ or 7/8″ “tenon cutter”, less than $15 each from Lee Valley Tools: The round tenon can also be made with a drawknife, carving knife, wood rasp etc. The mortise is made with the appropriate size of drill or brace bit. The thickness of the main shaft of the snath at that point–approximately the middle of the sapling–should be greater than the 1 1/4″ square stock discussed above. Experimentation and creative thinking, along with an understanding of the physics and mechanics, are the key to success.
There is much to learn about the creation of a snath, and if one takes it beyond the rudimentary level more questions will arise as well as many answers, just like life… Wildwood snaths
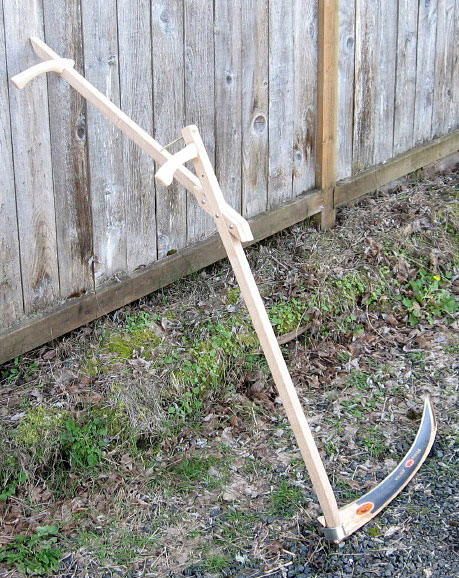
The “Oregon” snath – a two grip snath for all heightsby Steve Leppold(Click on photos for larger versions) A tall person who wants to use a scythe has limited options for finding a well-fitting snath. The one-grip “Slavic” or “Eastern style” snath is a good option (as presented by Peter Vido here with instructions for making them). Its straight shaft requires a relatively steep-tanged blade, and the single grip is forward-facing.
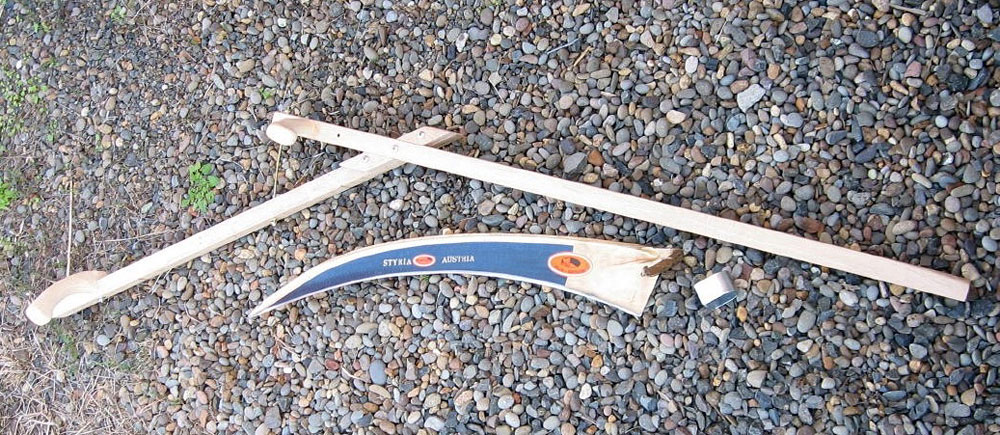
Like the one-grip snath, the Oregon snath can be made at home using hardwood lumber. A unique feature of the Oregon snath is that it can be disassembled into two halves for easier transportation. With both grips removed, the snath can pack down to an especially compact size.
The following brief instructions will attempt to explain what is not obvious from the photos, and will skip some details that are already covered on the ScytheConnection.com site. See the references below for the related information. To create an Oregon snath and optimize its fitting, it is best to already have on hand a blade that would otherwise be compatible with a straight one-grip snath for the user. This allows for a precise fitting process in real time with the blade attached. The matched units offered by ScytheConnection (note: in the past; ScytheConnection is no longer retailing scythes) give some clues as to which blades should work well with a one-grip snath for users in a specified height range, and Peter Vido has other blades available (not listed in the catalogue) with a range of tang angles reaching in excess of 50 degrees (which, when combined with a wedge, could work well for someone over 7 feet tall!) To estimate the required tang angle for anyone, regardless of height, a scale drawing can be made on graph paper, or a bit of trigonometry can be applied. Assuming the person is right-handed, measure the the height of the right hand in the mowing stance (usually with the right arm almost completely straight), and divide this number by the theoretical distance between right grip and end of snath (following the instructions for making the one-grip snath), and find the arcsine (or “inverse sine”) for this quotient. The result is the approximate tang angle required for both the one-grip snath and the Oregon snath.
Having the blade on hand, the first step of the precise fitting process would be to shape the end of the shaft to fit the blade. With the blade attached and resting on the ground at the proper angle for mowing, the optimal grip locations can be determined, starting with the right-hand grip. The unattached grip can be held by the user and tentatively positioned along the snath to find the best location. The distance from the right grip to the blade end of the Oregon snath should be similar to that described in the instructions for making the one-grip snath, but this distance can vary according to the physiology and preferences of the specific user. The tenon of the right-hand grip is then fitted into a hole in the snath (but not glued yet), or a removable right-hand grip (with hanger bolt and squared-off base) can instead be fitted into a dado in the snath, similar to the dado for the left-hand grip (in which case, the right grip can now be bolted into place, but don’t cut the dado yet). In the case of a removable grip, a second position for the right grip can be added, to give a position for field mowing and an alternate position for trimming.
|