
Peening with the hammer and anvil
The classical method of
scythe blade peening
(cold-shaping the edge with hammer and anvil)
TOOLS:
We suggest the use of the bar peen (i.e. “narrow-faced”) anvil and a flat-faced hammer, whereby the blade is placed on the anvil upside down. After working with diverse groups in several countries, we have established that most beginners do a better job this way, instead of using the cross-peen hammer and flat anvil. As an additional “convenience”, a greater variety of common hammers can be employed with this style of anvil (of which there are also many models). Nearly everyone already owns a hammer that is fine for the first attempts. Photos below:
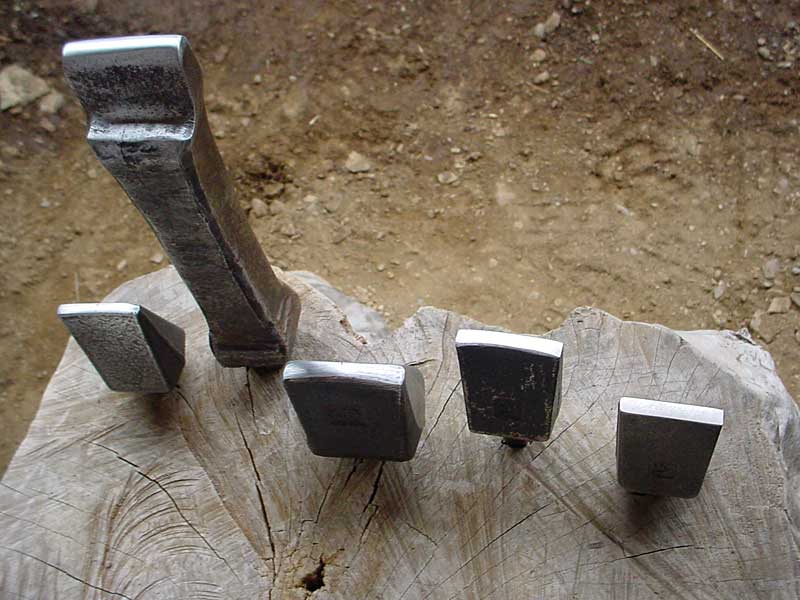
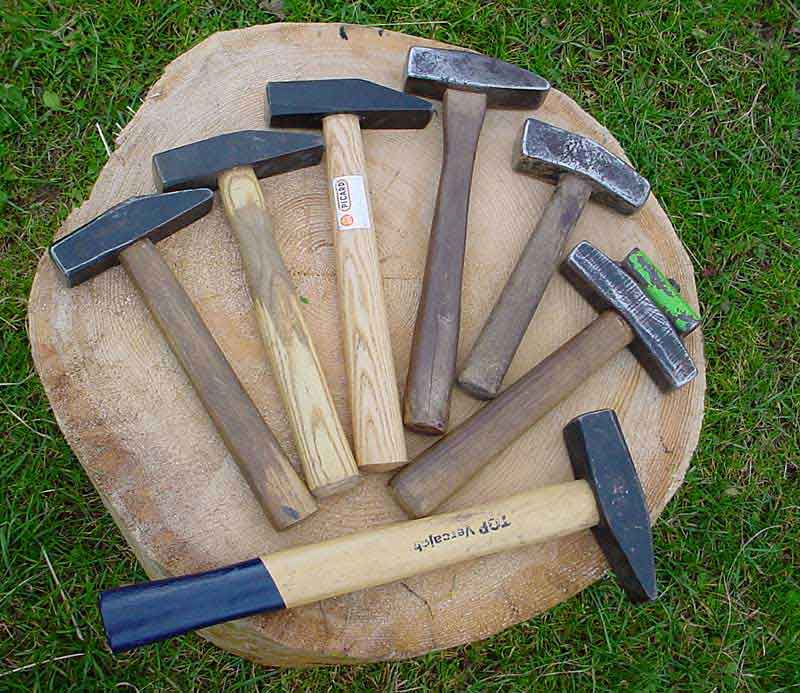
The preferred hammer head weight is 500 to 700 grams; the net weight of the anvil is less important. What does make a considerable difference is the quality of “draw” provided by the base into which it is set. Good draw, in effect, makes the hammer do more work with less of your own effort. (If you do not know what is meant by “draw”, consult with the nearest blacksmith or an elderly handyman.)
PRELIMINARY STEPS:
|
 |
- Rancho Mirage The anvil should be mounted in a steady base. For instance, use a large (30 cm. or more in diameter) block of hardwood set 5-10 cm deep into the ground. You can start with a 50 cm high block and a 10 cm lower seat, then experiment. Other options for an acceptable set-up are shown here. The best of them share the qualities of steadiness, draw, good blade support, comfortable posture of the person and that he/she can work in good light. (Direct sunlight causes too much reflection on the shiny spot of the edge you are trying to hit with accuracy.)
- Before peening, thoroughly clean the edge of the blade from both sides. (If you have a brand-new blade,read this section.) The edges of most working blades contain some tiny cracks, missing chips or slightly bent-over spots. Cleaning them helps in detecting small damages that were previously “invisible”. (For an extra “educational touch”, a close inspection of the edge with a 10x magnifying lens is surprisingly revealing.) Then decide which damages you want to repair and which of them can be worked around for the moment.
- Attend to all necessary repairs. (Refer to Repairing the Damaged Edge.) When repairing is finished, the edge should be smoothed with a fine grit stone or emery cloth. (The smoother the last 1mm of the edge, the less likely you develop the tiny cracks often caused by the peening hammer.)
With the tools, the set-up and the blade in good order for a peening session, let us now
CONSIDER THE “PATTERN”.
Although many experienced mowers manage to adequately tune up their blades by hitting the chosen width of the edge in some approximate fashion, I strongly recommend a definite “pattern”–i.e. a specific sequence of hammer strikes.
However, among the variety of such patterns, some are decidedly better than others… For instance, page 22 of Tresemer’s Scythe Book has a diagram which advises that four hammer blows are placed in sequence, with the first striking 3/8 inch/10mm from the edge and the others progressively nearer the very edge. In addition, he suggests that a 70cm blade should–after 12 hours of use–have its edge restored to the original perfection in five minutes.
Most European farmers I’ve seen work within the zone of 3-4 mm or less! They well know that the further away from the very edge one hits, the more likely will the process predispose cracks, wavy edge or loss of tension. They also peen considerably more often, and still not in a mere five minutes. In any case, Tresemer’s advice is fundamentally flawed–a nearly foolproof recipe for a messy job–and I regret that it has now been communicated so broadly to unsuspecting beginners.
Much more blade-friendly patterns are series of “lines” consisting of strikes placed next to each other running parallel to the edge (i.e. lengthwise). Depending on the condition of the blade and the exact mowing task at hand, from one to four such lines can make up the pattern. This may require placing the first line up to 5mm in from the edge, which even some seasoned mowers don’t attempt.
One line (placed 1-2mm from the edge) is enough for a novice to start with–and quite adequate in the case of frequently-peened blades for general use. Even a narrower line–one I refer to as “half-line”–will often have surprising effect. The photos here depict the progression of strikes in one-, two- and three-line patterns. It may not be readily apparent to some viewers that in all photos–whether the blade is shown from the top or the bottom–it is pointing to the right and its beard (even if outside the frame) is on the left. With other words, the individual strikes making up the lines progress from the beard towards the point. Another hint for the “high density” readers: if the edge is shown facing the bottom of the photo, you are looking at the underside of the blade; if the edge faces the top of the photo, you are looking at the top side of the blade (the way it lays on the ground when cutting). Of course, when it is in use, its point would be pointing towards the left unless, of course, you are using a left-handed blade, in which case all the photos above should be reversed….
Having decided on a suitable pattern, you can now finally get on with the job. With the edge surface adequately clean, the mark of each hammer strike will be readily visible. The individual imprints have the shape of an elongated oval, with no square corners. Their actual size varies from 1 x 3mm to 2 x 5mm, and depends somewhat on the shape of anvil and hammer surfaces (flat versus convex) as well as the force of the hammer blow. The exact size of each mark is less important than their uniformity and how they are placed.They should overlap each other slightly so that together they make a seemingly continuous line.
In real life there will, of course, be deviations from the ideal theory above. Don’t worry about it. No matter how “bad” the edge looks after the first attempt, it will get better in due time.
To be continued.
Oct. 2006
Updated Nov. 2007